what a transformation, especially in the last two pics
My VERY RUSTY VW T25 Camper Van Project
-
ilovedmymantas
- Registered user
- Posts: 1204
- Joined: Sat Jan 12, 2013 2:54 am
Re: My VERY RUSTY VW T25 Camper Van Project
It's amazing the difference a bit of cleaning up can do.
what a transformation, especially in the last two pics
what a transformation, especially in the last two pics
" It's not rust. It's age-related patina " 
1980 vauxhall cavalier MK1 1.6L, 1982 opel manta berlinetta 1.8s, 1985 opel manta 2.0 gte, 1990 cavalier 2.0 gl ,1994 cavalier sri x20xev
-1995 cdx x20xev
---------------
Matt
1980 vauxhall cavalier MK1 1.6L, 1982 opel manta berlinetta 1.8s, 1985 opel manta 2.0 gte, 1990 cavalier 2.0 gl ,1994 cavalier sri x20xev
-1995 cdx x20xev
---------------
Matt

Re: My VERY RUSTY VW T25 Camper Van Project
New rollers, circlip, locking pin and guide received.
Frightening how a few piddley bits in a jiffy bag can cost so much.
Anyway - here is everything fitted this lunchtime.
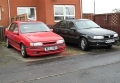
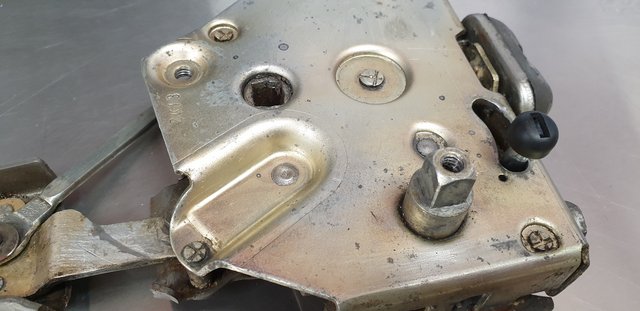
The main middle hinge and runner.
New roller and guide.
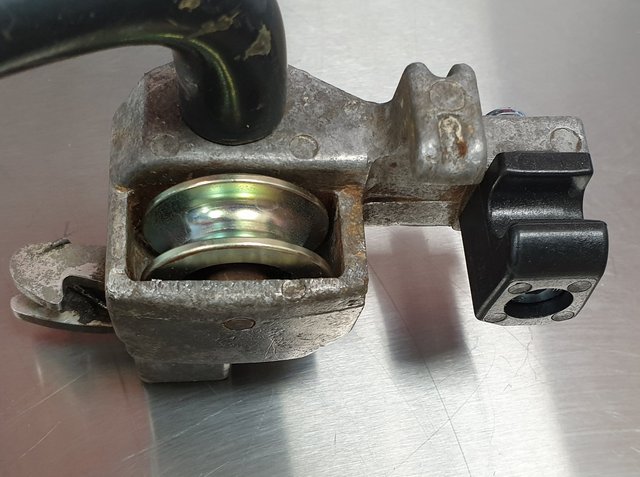
The bolt for the new guide was too short and only came with a plain half nut.
I fitted a longer bolt and a low profile nyloc nut.
And the roller is held in by a pin that needs to be knocked out and back in with a suitable sized pin-punch.
Even the simplest jobs should be done properly.
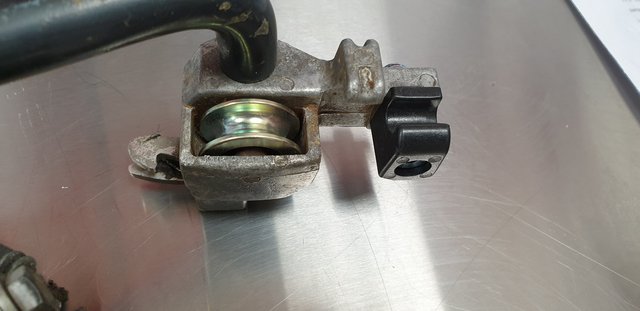
A new locking pin for the remote locking unit.
And the bottom runner.
New roller, felt seal and circlip.

That vertical roller is a damn tight fit, so I have no idea why VW think you need a circlip to keep it on.(hidden behind a push-in plastic cap).
The roller had to be held in a vice, whilst the location shaft was knocked out with a pin-punch.
The new bearing was pressed back onto the shaft using a deep 8mm double-hex socket.
One more job ticked off from the list.
Frightening how a few piddley bits in a jiffy bag can cost so much.
Anyway - here is everything fitted this lunchtime.
The main middle hinge and runner.
New roller and guide.
The bolt for the new guide was too short and only came with a plain half nut.
I fitted a longer bolt and a low profile nyloc nut.
And the roller is held in by a pin that needs to be knocked out and back in with a suitable sized pin-punch.
Even the simplest jobs should be done properly.
A new locking pin for the remote locking unit.
And the bottom runner.
New roller, felt seal and circlip.
That vertical roller is a damn tight fit, so I have no idea why VW think you need a circlip to keep it on.(hidden behind a push-in plastic cap).
The roller had to be held in a vice, whilst the location shaft was knocked out with a pin-punch.
The new bearing was pressed back onto the shaft using a deep 8mm double-hex socket.
One more job ticked off from the list.
Re: My VERY RUSTY VW T25 Camper Van Project
Week twenty-two.
Today I set about actually clearing out much of the stuff inside the van.
Offcuts and scrap metal were put under the front of the van, in a wheel dolly.
I managed to fill a red dustbin sack with rubbish, waste and muck.
Then another sack was filled with parts for me to work on / sort through at home.
I even swept out the interior of the van.
Ooh - looks almost tidy.

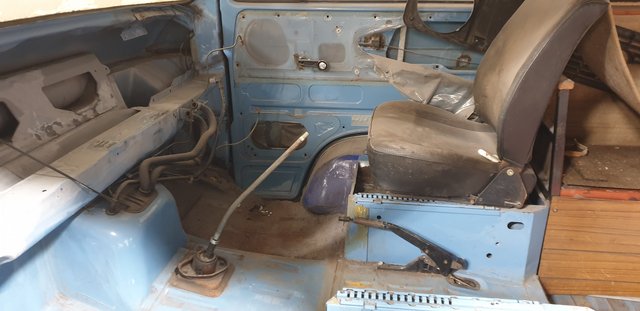
Then for some bizarre reason, I thought it would be good to strip out the side bench seat,

Ooh wooden battens to mount the trim panels. That bottom one is a bit black and damp.
The rear bench seat.
Weirdly the seat back hinges were pop-riveted to the body, and rested against curtain pole end pieces.
Not at all secure or crash testable.
I am glad that I did, because I felt that it needed rebuilding in a better / more secure, robust way.
And none of the mounting screws were a common size.
None of my spanners / sockets fitted.
I was therefore forced to use an adjustable spanner - but hey ho.
The high-light of the evening was the repair of the late grandfather-in-law's 3 ton Bradbury commercial trolley jack.
It has not been used for about 30 years, and was simply dumped in the van many years ago.
I tried to use it in 2015, but I did not move.
No apparrent pumping effect, so I assumed tatered seals.
Troy just whalloped the ram with a lump hammer, and hey presto, full service resumed.
As they say - "if in doubt, give it a clout"
Today I set about actually clearing out much of the stuff inside the van.
Offcuts and scrap metal were put under the front of the van, in a wheel dolly.
I managed to fill a red dustbin sack with rubbish, waste and muck.
Then another sack was filled with parts for me to work on / sort through at home.
I even swept out the interior of the van.
Ooh - looks almost tidy.
Then for some bizarre reason, I thought it would be good to strip out the side bench seat,
Ooh wooden battens to mount the trim panels. That bottom one is a bit black and damp.
The rear bench seat.
Weirdly the seat back hinges were pop-riveted to the body, and rested against curtain pole end pieces.
Not at all secure or crash testable.
I am glad that I did, because I felt that it needed rebuilding in a better / more secure, robust way.
And none of the mounting screws were a common size.
None of my spanners / sockets fitted.
I was therefore forced to use an adjustable spanner - but hey ho.
The high-light of the evening was the repair of the late grandfather-in-law's 3 ton Bradbury commercial trolley jack.
It has not been used for about 30 years, and was simply dumped in the van many years ago.
I tried to use it in 2015, but I did not move.
No apparrent pumping effect, so I assumed tatered seals.
Troy just whalloped the ram with a lump hammer, and hey presto, full service resumed.
As they say - "if in doubt, give it a clout"
Re: My VERY RUSTY VW T25 Camper Van Project
Robsey, they have been working on a VW Camper (type 2) in Practical Classics and this month there's an offer from Heritage Parts Centre of 10% off parts, before March 31, by using code 'PCLASSICS'
I guess parts can possibly by sourced from cheaper suppliers, but it might be useful.
Alan
I guess parts can possibly by sourced from cheaper suppliers, but it might be useful.
Alan
Re: My VERY RUSTY VW T25 Camper Van Project
A lot of the online shops are giving discounts.
It is all about keeping sales alive.
Thanks for the heads-up.
To be honest VW Heritage is not particularly any more expensive than other suppliers.
Camper van parts are stupidly expensive, no matter where you buy them from.
It is all about keeping sales alive.
Thanks for the heads-up.
To be honest VW Heritage is not particularly any more expensive than other suppliers.
Camper van parts are stupidly expensive, no matter where you buy them from.
Re: My VERY RUSTY VW T25 Camper Van Project
As you may have noticed, there was no trip to the unit this week.
Therefore I have been doing homework.
Stripping and cleaning parts for the van.
Then sorting them into boxes.
I am amazed at how many plastic parts there are...
On the doors alone there are vents, window winders, gaskets and spacers, rod securing clips, plastic mouldings with additional beautifying covers.
The list goes on and on...
Yesterday I cleaned my stainless steel hub-caps. Got out the Brasso wadding and gave them a good going over.
Ideally, I need to get a buffing wheel on them, but they are pretty good and tidy overall.
I would be intrigued to fathom out what the original 45mm centre badges were.
There are none at present. Just two mounting holes.
Last night I cleaned up the steering wheel.
Complete with hundreds of little teeth marks in the rim from the wife's first dog in the mid-80s.
Wow - it is a huge wheel. 45cm in diameter. (Or 18" to us old folk).
Obviously very useful for a commercial vehicle without power steering.
Re: My VERY RUSTY VW T25 Camper Van Project
Another crazy camper van reality.
I was looking at one of my front indicator units.
Cleaned some over spray off it, and gave it a good wash.
I was going to buy new bulb holders, as the one I had in this particular unit was very heavily corroded.
Looking online they only do USA spec double filament holders. Great if you want additional 5 watt corner marker lights.
These are priced at either £7.20 or £10.50 each...
Here is the crazy bit.
I can buy a pair of brand new front indicator units complete with UK / Europe spec bulb holders for £16.50 delivered.
It makes sense to buy a pair of new units, and simply use the bulb holders.
Keep the units themselves as spares.
Re: My VERY RUSTY VW T25 Camper Van Project
Week Twenty-Four.
This week was more like redecorating the house.
Or at least stripping the wallpaper...
The van walls and ceiling are covered in a fabric which for all intents and purposes looks to have a paper backing.

Oddly, the van is pale blue, but the interior is a very pale brown / biscuit colour.
I thought a nice medium grey would look more inline with the blue, but I understand that the boss wants to keep the warm feel and look of the biscuit colour.
------------------------------------------
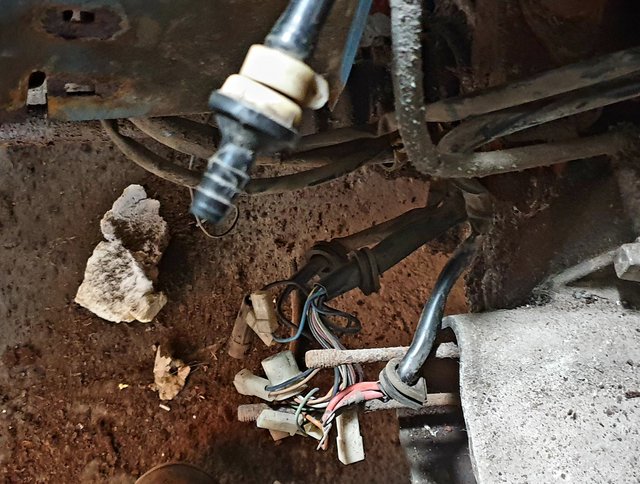
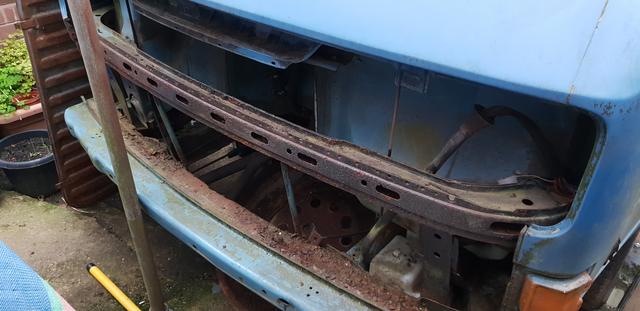
Further tasks were to remove the huge loom that runs the full length of the van.
All that I need to release now, is the battery cables under the driver's seat, and the two cables to the starter motor.
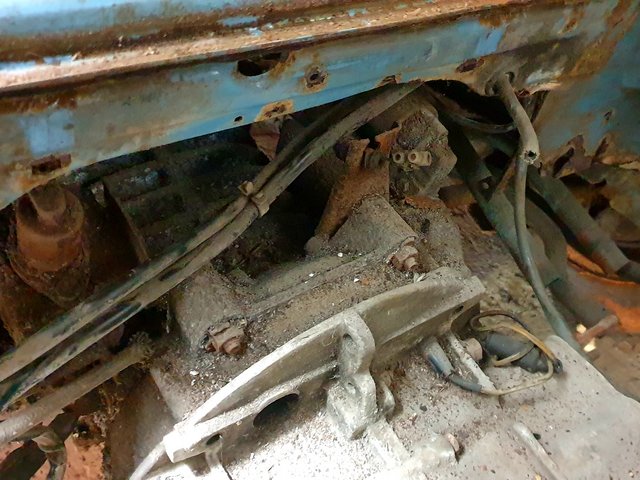
Here are the tails for the main loom, where it would emerge into the engine bay junction box.
A strange thing to notice, was that I could stand up inside the engine bay, with my feet on the floor, and about 3" of head room in the back of the van.
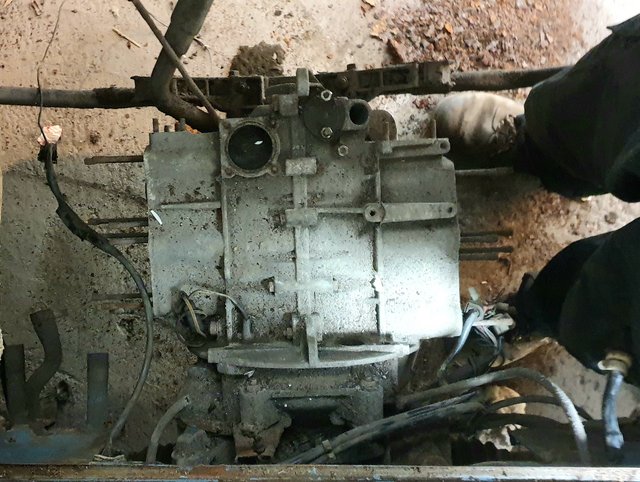
As you can see - only the engine block is there. The cylinder heads are at my house.
-------------------------------------
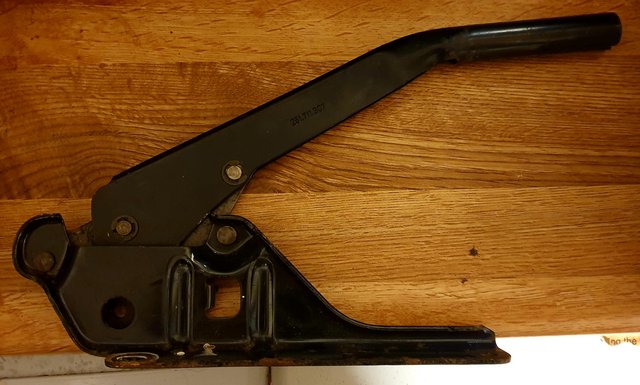
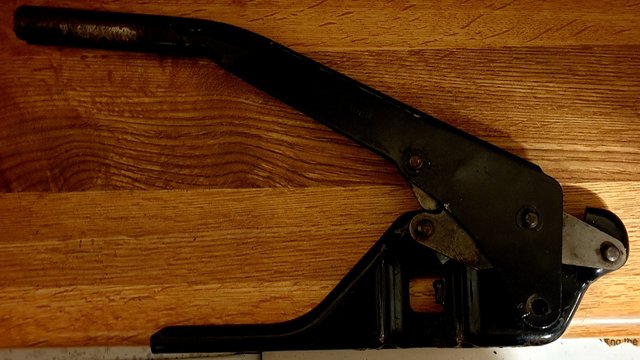
I also removed the handbrake lever, as I want to modify it so that a switch can be fitted. This van does not have a handbrake warning light not activation switch.
------------------------------------
Quirky observation - at the end of the night, I noticed that the etching on the glass was the wrong way round.
Do I have an off-side rear window fitted on the nearside rear window aperture???
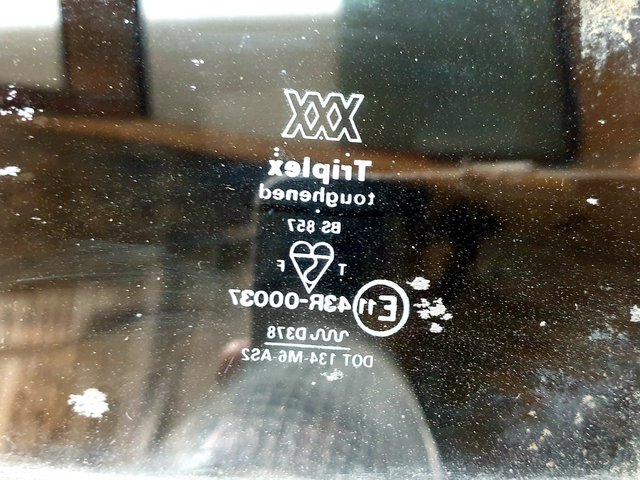
I always thought that the etchings were intended to be read from the exterior of the vehicle...
-----------------------------------
And another nomination for numpty of the week award - goes to me for leaving my tool bag at the unit last night, despite needing it to configure patient's wheelchairs over the next four days.
Ah well - poo happens. - lol
This week was more like redecorating the house.
Or at least stripping the wallpaper...
The van walls and ceiling are covered in a fabric which for all intents and purposes looks to have a paper backing.
Oddly, the van is pale blue, but the interior is a very pale brown / biscuit colour.
I thought a nice medium grey would look more inline with the blue, but I understand that the boss wants to keep the warm feel and look of the biscuit colour.
------------------------------------------
Further tasks were to remove the huge loom that runs the full length of the van.
All that I need to release now, is the battery cables under the driver's seat, and the two cables to the starter motor.
Here are the tails for the main loom, where it would emerge into the engine bay junction box.
A strange thing to notice, was that I could stand up inside the engine bay, with my feet on the floor, and about 3" of head room in the back of the van.
As you can see - only the engine block is there. The cylinder heads are at my house.
-------------------------------------
I also removed the handbrake lever, as I want to modify it so that a switch can be fitted. This van does not have a handbrake warning light not activation switch.
------------------------------------
Quirky observation - at the end of the night, I noticed that the etching on the glass was the wrong way round.
Do I have an off-side rear window fitted on the nearside rear window aperture???
I always thought that the etchings were intended to be read from the exterior of the vehicle...
-----------------------------------
And another nomination for numpty of the week award - goes to me for leaving my tool bag at the unit last night, despite needing it to configure patient's wheelchairs over the next four days.
Ah well - poo happens. - lol
Re: My VERY RUSTY VW T25 Camper Van Project
Further to this I also brought another two bags of parts home.
A bin-liner full of large plastic panels.
(Tail light cluster, glove box, heater panel cover and much more ...)
And a carrier bag full of smaller parts.
Both bags will need going through.
Then even more sorting, cleaning, refurbing and storing in boxes.
From memory, it is only the cupboards (bench seats), front cab seats, original rusty wheels, repair panels and the very big plastic body panels left in the van.
Most of the rest has been brought home.
The van is still packed to the rafters - lol.
Plenty more sorting to do,
and wallpaper stripping.

Re: My VERY RUSTY VW T25 Camper Van Project
might get some welding done on this bloody thing soon!
Re: My VERY RUSTY VW T25 Camper Van Project
There is no rush fella -
It can wait until next year...
Which is only a couple of weeks away.
I am just clearing the decks, so that we can have a stripped body to work on.
It can wait until next year...
Which is only a couple of weeks away.
I am just clearing the decks, so that we can have a stripped body to work on.
Re: My VERY RUSTY VW T25 Camper Van Project
More homework - the original rear area electrics.
Because I am sad, I chose to wash the looms that I took from the rear of the van on Monday.
This comprised.
The rear light cluster loom,
And the number plate lights mini-loom.
Nothing much to do on the number plate light loom... wires look good overall, but perhaps the female spade connects will want replacing with new ones.
Of course I will crimp, solder and sleeve for a long lasting job.
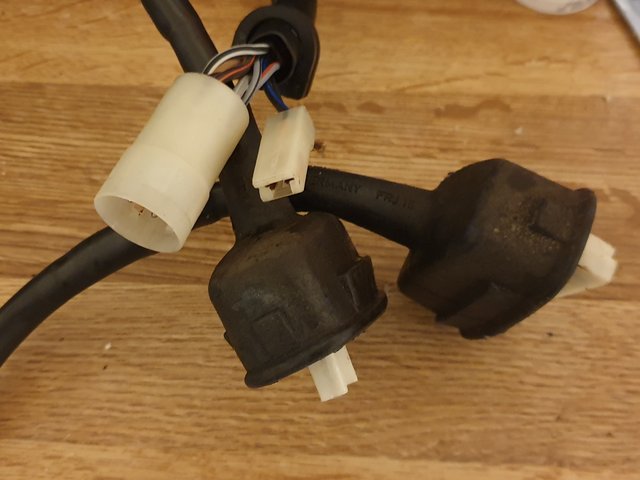
The rear light cluster loom was a different story.

Two electrical connecting-blocks to be removed, where a caravan N7 plug was wired in.
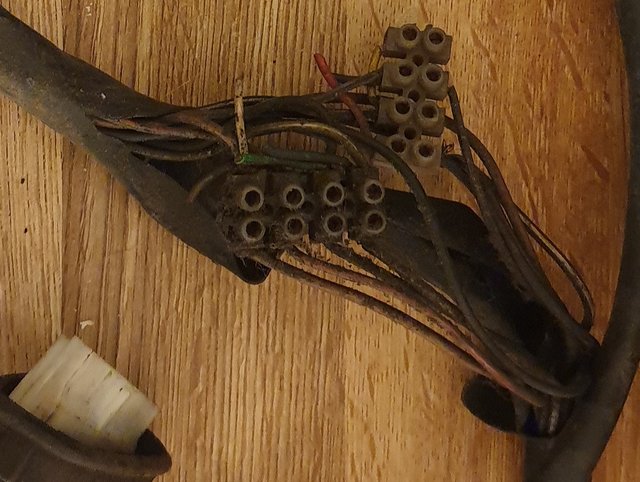
A really good scrub up to remove many years worth of muck.
And repair the rear fog light wire, which must have been cut to add an anti-dazzle unit.
(Cut power to rear fog light, so it does not glare back at the driver from the front of the caravan)
The wire also appears to be scorched.
(3rd wire down - Grey / White).
So plan is to replace the whole wire, and add another wire to the opposing cluster.
As per European protocol, they only wire in one fog light. The other has the pin in the socket... but no wire in the plug.

Amazingly all the wiring pins were in good clean condition.
The plan will be to make up or splice in new wires from the "soon to be butchered" front-to-rear early body loom.
Hopefully get the loom out next Monday evening.
----------------------------------
Last night I looked at the handbrake lever.
The challenge here is where to add a warning light switch.
Hmm - thought required - lol.
Because I am sad, I chose to wash the looms that I took from the rear of the van on Monday.
This comprised.
The rear light cluster loom,
And the number plate lights mini-loom.
Nothing much to do on the number plate light loom... wires look good overall, but perhaps the female spade connects will want replacing with new ones.
Of course I will crimp, solder and sleeve for a long lasting job.
The rear light cluster loom was a different story.
Two electrical connecting-blocks to be removed, where a caravan N7 plug was wired in.
A really good scrub up to remove many years worth of muck.
And repair the rear fog light wire, which must have been cut to add an anti-dazzle unit.
(Cut power to rear fog light, so it does not glare back at the driver from the front of the caravan)
The wire also appears to be scorched.
(3rd wire down - Grey / White).
So plan is to replace the whole wire, and add another wire to the opposing cluster.
As per European protocol, they only wire in one fog light. The other has the pin in the socket... but no wire in the plug.
Amazingly all the wiring pins were in good clean condition.
The plan will be to make up or splice in new wires from the "soon to be butchered" front-to-rear early body loom.
Hopefully get the loom out next Monday evening.
----------------------------------
Last night I looked at the handbrake lever.
The challenge here is where to add a warning light switch.
Hmm - thought required - lol.
Re: My VERY RUSTY VW T25 Camper Van Project
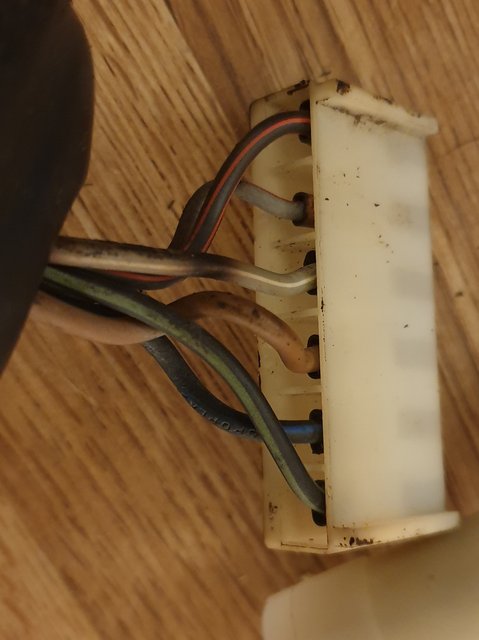
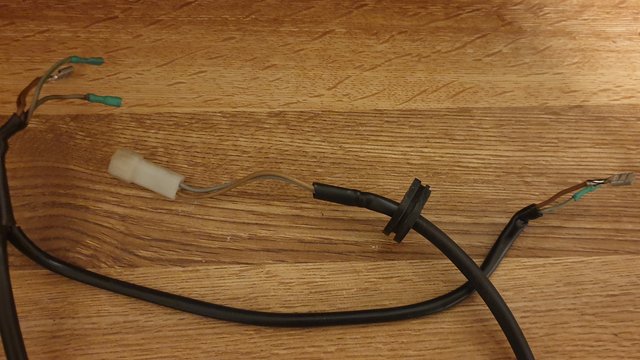
Loom sorted.
2 metres of wire,
6 soldered and heat shrink sleeved joints,
1 new female spade connector,
And about 5 metres of Tesa (looming) tape.
To produce this.
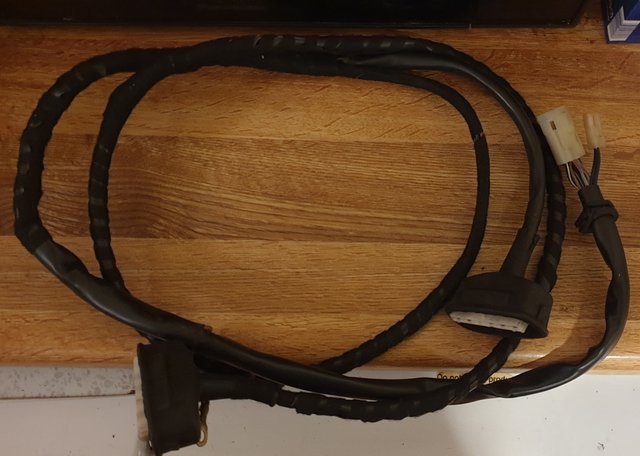
Not perfect, but a lot better than before.
Okay - Next!!
As you can see - no butchery required.
I was able to use some spare ex-project wire instead.
2 metres of wire,
6 soldered and heat shrink sleeved joints,
1 new female spade connector,
And about 5 metres of Tesa (looming) tape.
To produce this.
Not perfect, but a lot better than before.
Okay - Next!!
As you can see - no butchery required.
I was able to use some spare ex-project wire instead.
-
ilovedmymantas
- Registered user
- Posts: 1204
- Joined: Sat Jan 12, 2013 2:54 am
Re: My VERY RUSTY VW T25 Camper Van Project
I'd fit the new ones to complement the shiny fresh paintwork and keep the old ones as spares. If you ever need them it'll hopefully be in the distant future when they'll be a better match to the paintwork - lolRobsey wrote:Another crazy camper van reality.
…..I can buy a pair of brand new front indicator units complete with UK / Europe spec bulb holders for £16.50 delivered.
It makes sense to buy a pair of new units, and simply use the bulb holders.
Keep the units themselves as spares.
When I get my accident damage fixed I'll get the tailgate painted to match the recent rear wings and fit the nos light clusters along with the uncracked number plate panel - why not, the car only has to outlast me
----------------
The loom looks nice
Am I right in assuming the gaps in the tesa tape are to promote cooling?
" It's not rust. It's age-related patina "
1980 vauxhall cavalier MK1 1.6L, 1982 opel manta berlinetta 1.8s, 1985 opel manta 2.0 gte, 1990 cavalier 2.0 gl ,1994 cavalier sri x20xev
-1995 cdx x20xev
---------------
Matt
1980 vauxhall cavalier MK1 1.6L, 1982 opel manta berlinetta 1.8s, 1985 opel manta 2.0 gte, 1990 cavalier 2.0 gl ,1994 cavalier sri x20xev
-1995 cdx x20xev
---------------
Matt
Re: My VERY RUSTY VW T25 Camper Van Project
The gaps in the tape are to allow some flexibilty in the loom, rather than strapping the cables rigidly together.
The tape is also there, because I had to slice the plastic sleeving to replace and repair the damaged wires.
As for shiny paintwork...
I am not sure that I want a 40 year old vehicle to be "un-naturally" shiny.
My plan was always to make the van roadworthy, as cheap as possible.
Not a concourse or show finish.
Although "cheap" has long since gone out of the window.
We have barely scraped the surface, and it has already cost me more than the Cavalier restoration.
UPDATE :-
18/12/2020 11:55 pm.
The rear number plate mini-loom also sorted.
Just a matter of replacing and soldering on all five female spade connectors.
2 off 6.3mm and
3 off 2.9mm.
The small connectors were then sleeved in green shrink tubing as they are the positive supply line.
(Grey wire with green stripe).
Oh dear - my house is getting full of van parts in various stages of restoration or repair.
Re: My VERY RUSTY VW T25 Camper Van Project
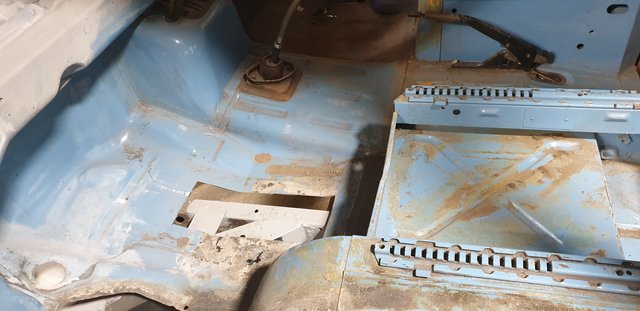
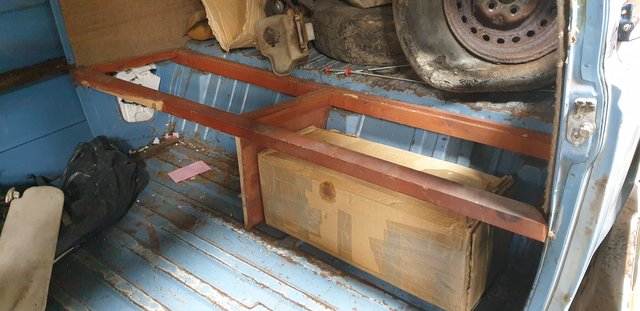
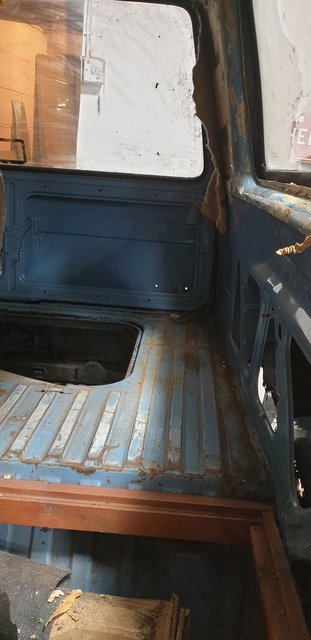
Carrying on where I left off last week...
I moved from the near-side to the off-side
Interior panelling.
Before - with biscuit coloures cards, lining fabric and rear seat frame in situ.
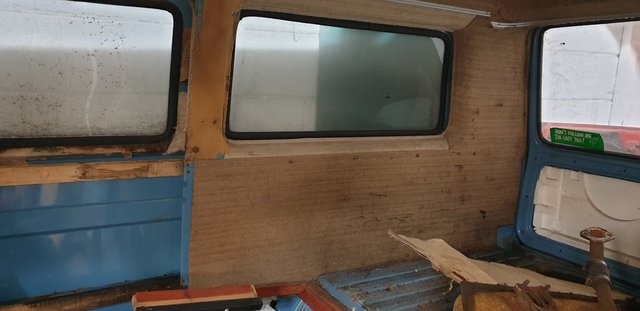
Later - with side panelling removed and some lining fabric.
Note also that most of the rear seat frame has gone.
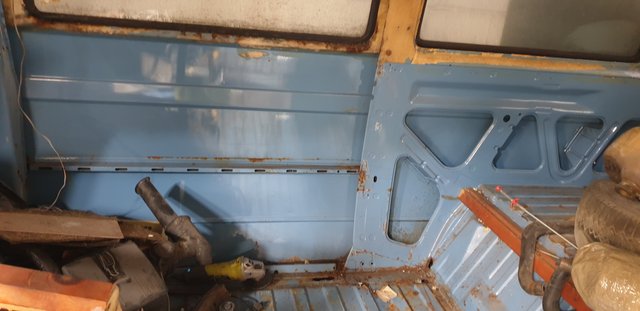
Also the rotten wooden beams have gone from the side wall.
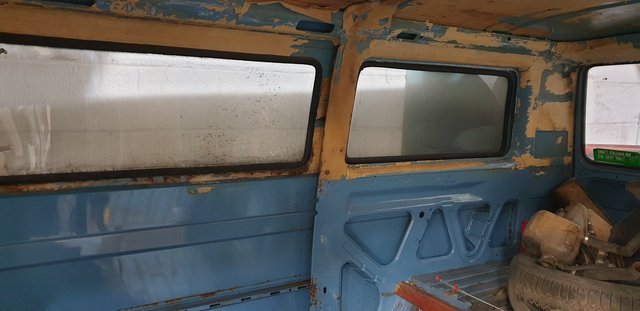
For some reason, the father-in-law had filled all the side walls in polystirene packaging from lord knows what.
I pulled all this out, so that I can get full access the the van walls.
There is a couple of small holes on the near-side of the cargo area floor.
I also had to drill off all the curtain rails that were pop-rivetted to the van, to remove all remnants of the lining fabric.
Still plenty of lining paper to remove.
I then spent what seemed like an eternity removing the front to back loom.
I started this last week, but it was still fighting my efforts to pull the cable through holes in the chassis...
Eventually it conceeded defeat.
I will compare it to my replacement digi-jet loom, which is also fitted with later-shaped fusebox connectors.
I was also able to unclip the reverse gear wiring and the alternator wiring mini-looms.
Last job.... well faff really, was to see how my original van seats would come up with a brief clean.
Not bad really.
Good old-fashioned work van textured vinyl.
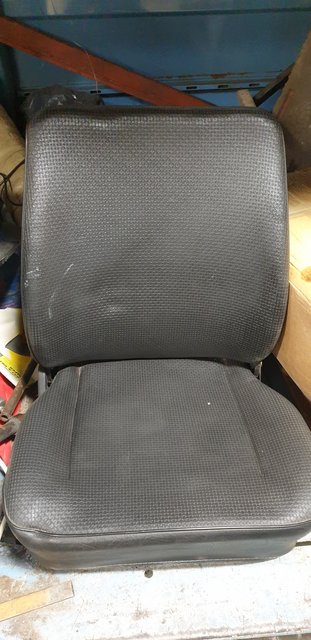
It would be rude not to use them, even though much comfier tatty seats from another car had been left in the van for thirty years or so.
Time will tell if I fit grey Cavalier LSi seats in years to come.
I moved from the near-side to the off-side
Interior panelling.
Before - with biscuit coloures cards, lining fabric and rear seat frame in situ.
Later - with side panelling removed and some lining fabric.
Note also that most of the rear seat frame has gone.
Also the rotten wooden beams have gone from the side wall.
For some reason, the father-in-law had filled all the side walls in polystirene packaging from lord knows what.
I pulled all this out, so that I can get full access the the van walls.
There is a couple of small holes on the near-side of the cargo area floor.
I also had to drill off all the curtain rails that were pop-rivetted to the van, to remove all remnants of the lining fabric.
Still plenty of lining paper to remove.
I then spent what seemed like an eternity removing the front to back loom.
I started this last week, but it was still fighting my efforts to pull the cable through holes in the chassis...
Eventually it conceeded defeat.
I will compare it to my replacement digi-jet loom, which is also fitted with later-shaped fusebox connectors.
I was also able to unclip the reverse gear wiring and the alternator wiring mini-looms.
Last job.... well faff really, was to see how my original van seats would come up with a brief clean.
Not bad really.
Good old-fashioned work van textured vinyl.
It would be rude not to use them, even though much comfier tatty seats from another car had been left in the van for thirty years or so.
Time will tell if I fit grey Cavalier LSi seats in years to come.
Re: My VERY RUSTY VW T25 Camper Van Project
For things that can easily be reversed, I would always personally go for the more comfortable option.
I've driven many different vehicles over the years and have found the most comfortable seats ever to be velor seats out of a phase 2 Volvo 440 with heater element. I once did over 600 miles without stopping and felt like I had just got up out of an armchair.
Perhaps instead of the Cavalier seats you could hunt out a set from a late calibra like I'm fitting to my van?
Re: My VERY RUSTY VW T25 Camper Van Project
I believe there are some lovely Saab seats that will fit the van - with a bit of modification to the seat rails.
I was thinking of keeping things simple, and then retro fitting alternatives at a later date.
At this point, I have no idea how much use the van will get, other than occasional weekend warrior type stuff.
Dependent upon how reliable it is,
it may just get little short runs to the seaside or shows.
These vans are notoriously unreliable - eeek.
The most basic of fuel injection set-ups. Digi-jet.
Re: My VERY RUSTY VW T25 Camper Van Project
I believe that Digi jet was what I had in an 87 golf GTi that I owned in the late 90's never had any trouble with it, and that poor car spent most of its time at over 100, ( I was a teenager and stupid).
Re: My VERY RUSTY VW T25 Camper Van Project
It may well have been, albeit on a proper engine.
The flat fours are a strange breed.
If I am thorough enough with the injection loom and sensors, it should be okay.
But... it is a 40 year old van, so who knows.
The flat fours are a strange breed.
If I am thorough enough with the injection loom and sensors, it should be okay.
But... it is a 40 year old van, so who knows.
Re: My VERY RUSTY VW T25 Camper Van Project
Is the engine in this a boxer like the Subaru ? If so I've got a spare 1.8 one going free if you or anyone wants it?
Re: My VERY RUSTY VW T25 Camper Van Project
The original engine is one of the first water-cooled "wasser"-boxers.
It is a defunkt 1983 1.9 unit with a Solex Pic carburettor - kicking out a piddling 50 or 60 bhp.
The replacement unit (in my back yard) is a 1987 2.1 unit with digi-jet injection giving 112 bhp.
They never made a 1.8 for the transporter, so it will be from a different model.
It is a defunkt 1983 1.9 unit with a Solex Pic carburettor - kicking out a piddling 50 or 60 bhp.
The replacement unit (in my back yard) is a 1987 2.1 unit with digi-jet injection giving 112 bhp.
They never made a 1.8 for the transporter, so it will be from a different model.
Re: My VERY RUSTY VW T25 Camper Van Project
Sorry should of clarified that it's a Subaru engine, I believe a conversion is quite popular for campers, particularly the Impreza engine. This engine.just has a simple carb and distributor set up, and no cambelt to change as the cams are driven by gear wheels so never fails.
Re: My VERY RUSTY VW T25 Camper Van Project
The popular Subaru conversions are the EJ20 or EJ22.
They require all the water inlet ducting to be "reversed" to allow for the change in pipe orientation of the camper van.
And a bespoke bell-housing and mounts.
Looking at about £1300 for the conversion parts - on top of the cost of the complete engine, electrics etc...
The "standard" transporter boxers and water boxers were also free from timing belts and chains.
The weakness comes with the poor water jacket that can leak... and the electronics when the sensors get old or connections get dirty.
--------------------------------
Today I painted my wiper assembly and heater controls...again.
Troy whined like a spoilt girlie when I used up some old Peugeot / Citroen Royal Blue paint on the parts.
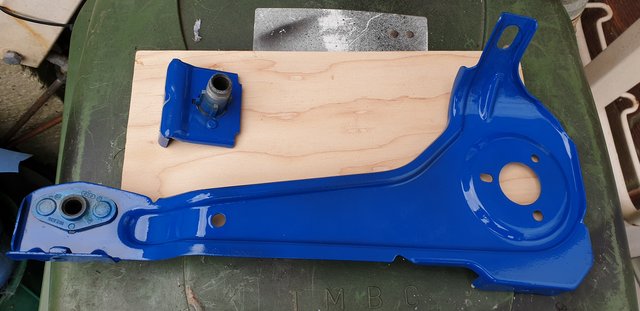
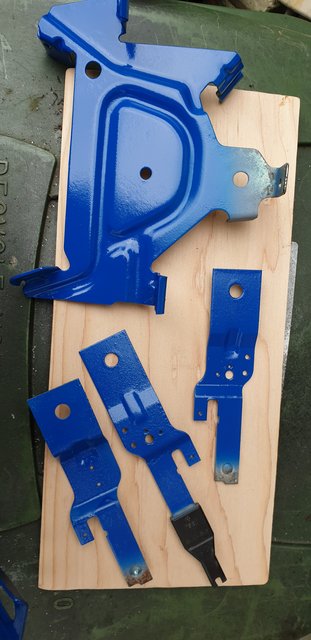
So here we go - assembled in black.
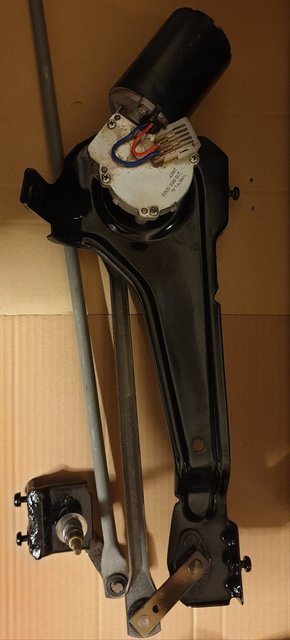
I suppose it looks more original.
I still like the blue though - lol.
They require all the water inlet ducting to be "reversed" to allow for the change in pipe orientation of the camper van.
And a bespoke bell-housing and mounts.
Looking at about £1300 for the conversion parts - on top of the cost of the complete engine, electrics etc...
The "standard" transporter boxers and water boxers were also free from timing belts and chains.
The weakness comes with the poor water jacket that can leak... and the electronics when the sensors get old or connections get dirty.
--------------------------------
Today I painted my wiper assembly and heater controls...again.
Troy whined like a spoilt girlie when I used up some old Peugeot / Citroen Royal Blue paint on the parts.
So here we go - assembled in black.
I suppose it looks more original.
I still like the blue though - lol.
Re: My VERY RUSTY VW T25 Camper Van Project
For those who want to know what a sad git I really am.
Yesterday (Christmas Eve), I brought a sack of large plastic parts in from the wife's Vectra, where they have been sat in the back seat for two weeks.
I set about washing everything by hand, whilst the wife watched some true crime, forensic type programs on tv.
First was the blower motor front trim with front footwell ducts.
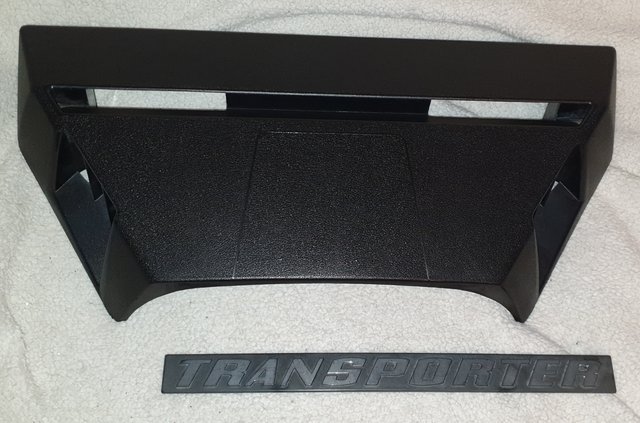
It is a big central component of the front lower dash. Came up quite nice with soapy water and a coating of shoe-black.
I cleaned the "TRANSPORTER" badge too, but the silver text is quite worn off.
I could buy a new one... at 50 quid!!
Hell no!! I can easily paint the letters to suit.
--------------------------------------
Next part is the tail light unit...
Hmm the reflector has a heat bulge in it, and the bulb holder has some corrosion.
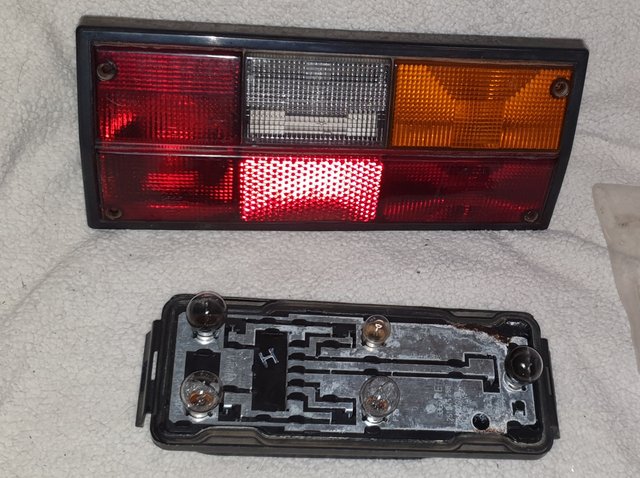
I could keep the original tail light for a bit of charactor... and I am sure the metal tracks will clean up okay.
----------------------------------
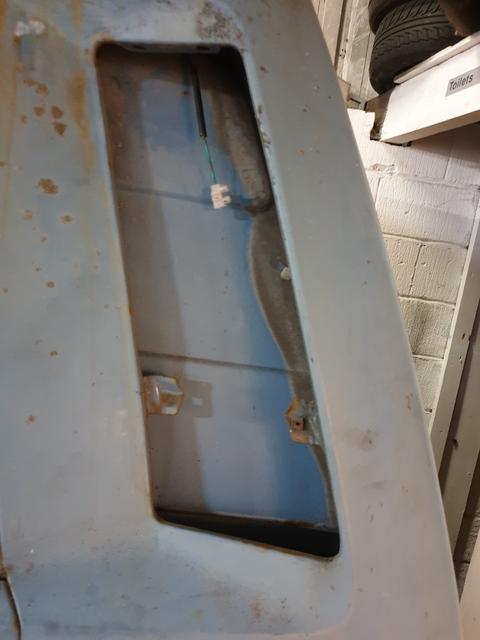
This is a cover that sits under the instrument cluster.
As you can see by the indentations, the brake master cylinder and reservoir sit in the centre. A rediculous place to put the protective cover.
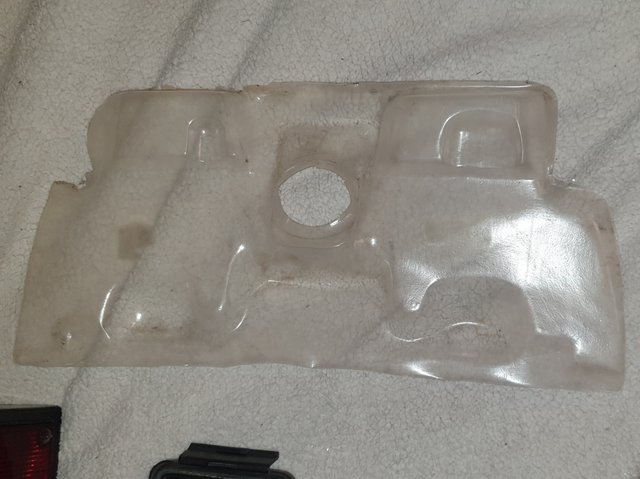
I am not sure if it is to collect stray brake fluid, or to prevent shorting out by the instrument cluster.
-----------------------------------
Two random looking parts: -
Rear stale air vent (top), and the front fan intake plastic mesh (bottom).
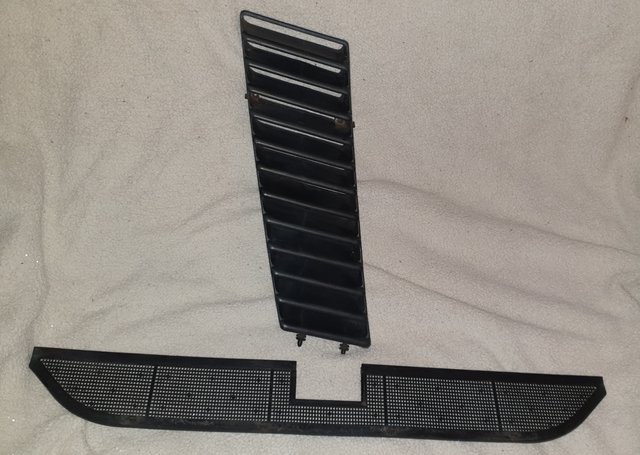
The stale air vent is the left side vent which sits in the 'd' pillar.
And the air vent mesh sits at the front behind the headlamp grille.
(Centre-top of hole below windscreen).
----------------------------------
Last and largest part is the glove box.
It is quite deep vertically, but shallow from front to back.
So only good for carrying map books, owner's manual or other A4 size documents.

Yes there is a lock that fits in the hole, but we have no key for it. It is the only lock in the whole van that the main 'N' type key does not fit.
It doesn't need locking anyway. We don't have any valuables.
Yesterday (Christmas Eve), I brought a sack of large plastic parts in from the wife's Vectra, where they have been sat in the back seat for two weeks.
I set about washing everything by hand, whilst the wife watched some true crime, forensic type programs on tv.
First was the blower motor front trim with front footwell ducts.
It is a big central component of the front lower dash. Came up quite nice with soapy water and a coating of shoe-black.
I cleaned the "TRANSPORTER" badge too, but the silver text is quite worn off.
I could buy a new one... at 50 quid!!
Hell no!! I can easily paint the letters to suit.
--------------------------------------
Next part is the tail light unit...
Hmm the reflector has a heat bulge in it, and the bulb holder has some corrosion.
I could keep the original tail light for a bit of charactor... and I am sure the metal tracks will clean up okay.
----------------------------------
This is a cover that sits under the instrument cluster.
As you can see by the indentations, the brake master cylinder and reservoir sit in the centre. A rediculous place to put the protective cover.
I am not sure if it is to collect stray brake fluid, or to prevent shorting out by the instrument cluster.
-----------------------------------
Two random looking parts: -
Rear stale air vent (top), and the front fan intake plastic mesh (bottom).
The stale air vent is the left side vent which sits in the 'd' pillar.
And the air vent mesh sits at the front behind the headlamp grille.
(Centre-top of hole below windscreen).
----------------------------------
Last and largest part is the glove box.
It is quite deep vertically, but shallow from front to back.
So only good for carrying map books, owner's manual or other A4 size documents.
Yes there is a lock that fits in the hole, but we have no key for it. It is the only lock in the whole van that the main 'N' type key does not fit.
It doesn't need locking anyway. We don't have any valuables.