Putting Full CAN Infotainment in a Cavalier

Post queries regarding your Mk3 Cavalier's ICE and electrical components (head units, wiring, retro-fit toys, upgrades etc.) here

Moderator: Robsey

User avatar
Robsey
Club Admin
Posts: 10612
Joined: Fri Dec 12, 2008 1:42 pm
Location: East Manchester

Putting Full CAN Infotainment in a Cavalier

Post by Robsey »

Very late last night I checked that the complete standalone loom still worked...
But I wasn't faffing with the programming bit yet.

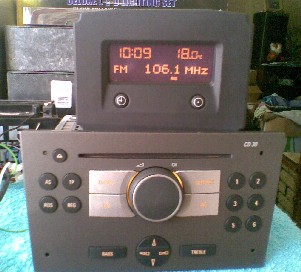
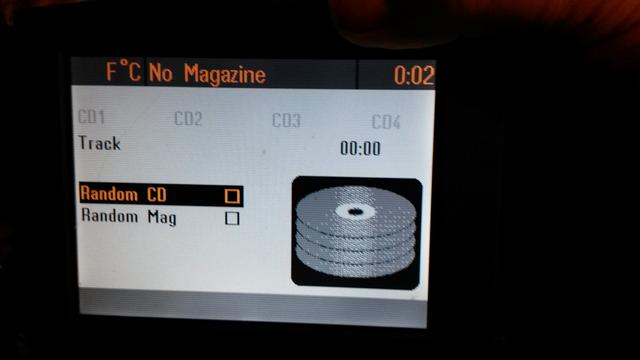
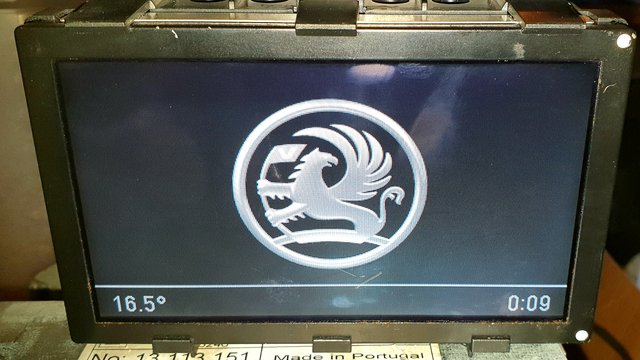
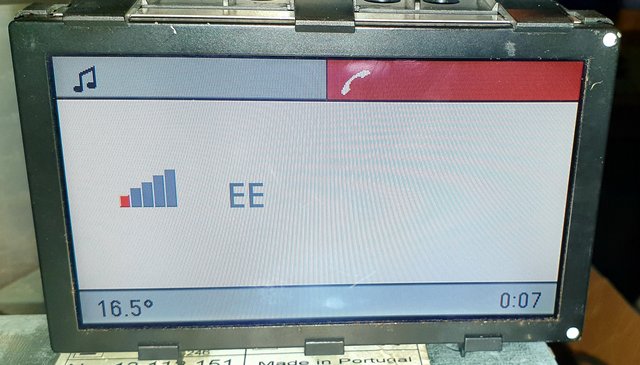
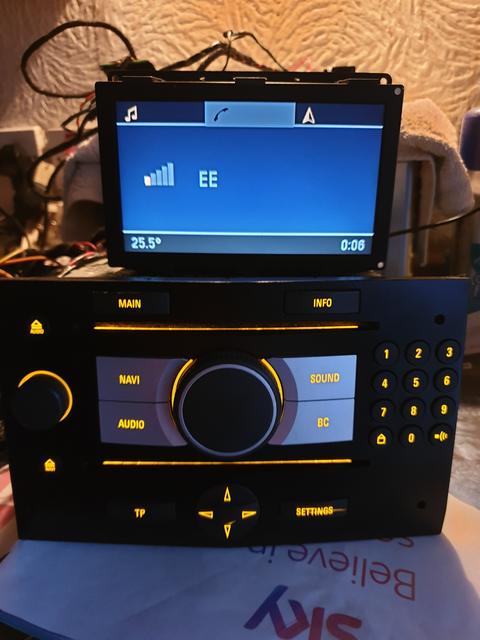
All worked fine, but the display was showing a "UHP4 Safe" message.
It has not yet been programmed in.
Satisfied, I turned it all off and went to bed. :D

------------------------------

Today after many months, I finally thought that I would do the programming bit. :geek:

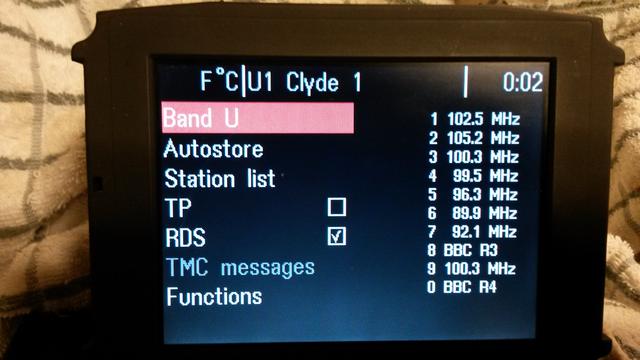
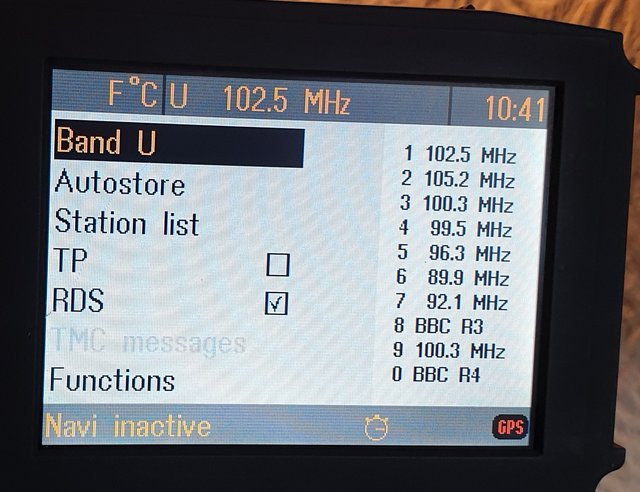
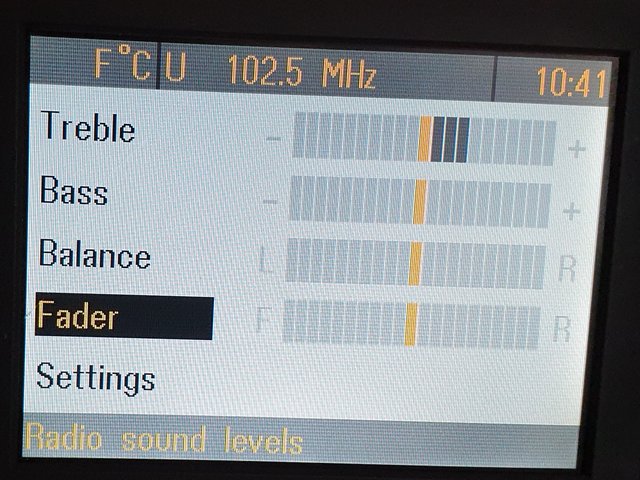
First step was to modify all the Mid-Speed CAN network settings to show UHP4 "present".

Then change the UHP4 code index to 024.02 (I think) for Vectra-C hatchback.

Then it was time to do the pairing up bit.
The only bit that needs the correct security code.
It was having none of it, even with the correct code as extracted from the display Eeprom. :wall

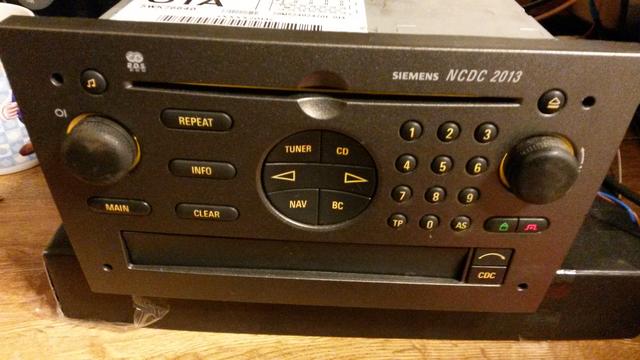
When looking on my trusty VauxCom enhanced 100820b and firmware V1.44, I see it says : -
I.D. - Okay.
Security Wait Time - Running.
Remaining Attempts - 5.

Ah - that is why it is ignoring my numerous attempts.
I am locked out until the security wait time has elapsed.

So as with any locked radio...it has always been the procedure, that the wait time is with ignition and radio / headunit on.

----------------------------------------

After about 15 minutes I had another go.

It took about three cycles of -
1 - clear dtc's
2 - disable anti-theft protection,
3 - turn everything off for 30 seconds.
4 - clear dtc's
5 - enable anti-theft protection.
And repeat ...
After the first cycle, my remaining attempts jumped back up to 10.

After the second cycle, (step 3) my headunit and display were divorced -
"Display Safe" showing on the display.

Connected up the UHP4 and continued on with step 4.

After the third complete cycle, everything was paired up - woohoo... :thumb
No more error messages. Yayy.

Image

Image

Image

Apologies to those who think that the Mad Professor has just landed. :ugeek: :ugeek:
User avatar
Robsey
Club Admin
Posts: 10612
Joined: Fri Dec 12, 2008 1:42 pm
Location: East Manchester

Putting Full CAN Infotainment in a Cavalier

Post by Robsey »

I think it is too short notice, to have this fitted for VauxFest 2019 in less than 6 days.
:?

There is a chuffing load of wiring installation required to facilitate that.
:ugeek: :ugeek: :ugeek:

And the WHOLE dash would need to come out - again!! :roll: Yikes!! :shock:

It looks mega when fitted and working... 8-)
But it is a shed-load of work involved to achieve it.

Maybe next year, unless a miracle happens. :scratch
User avatar
Robsey
Club Admin
Posts: 10612
Joined: Fri Dec 12, 2008 1:42 pm
Location: East Manchester

Putting Full CAN Infotainment in a Cavalier

Post by Robsey »

Here we go again...

This afternoon, I decided to partially strip and re-work my display surround.
(Modified heater panel).

There has always been an issue where the aperture was not quite tall enough, meaning that some of the top line of the display was obscured.

I broke off the filler, and heated the plastic trim to remove the taper.
Now that the taper across the top of the display has been 'squared off' it should now mean that the apperture is 5mm taller.

I just need to re-bond, fill, dress and paint the surround - again.
---------------------------------------

Next phase will be to re-check my CAN loom and make any alterations to provide a tidier installation and better wiring compatibility.

The installation should be able to follow the route of the Cavalier loom.

From left to right.

Behind glove-box - left side.
BCM - (Body control module).
(Single wire, low speed CAN network control)
Control of all system voltages and functions.

Behind glove box - behind.
Uhp4 (bluetooth module)

Inside glove-box.
Illumination brightness control rocker switch.
EOBD2 - diagnostic connector.

Centre-Dash area behind heater panel / radio.
Display and Headunit.
(Mid Speed Network / Infotainment).

The Battery Live, Ignition Live, Illumination Live, speed pulse signal and system ground are connected via the Cavalier radio's 16 pin ISO connector.
ISO to Quadlock conversion is built into the loom.

Behind instruments and light switch.
CIM (collumn integrated module) - (ignition logic function.)
Lighting control circuit board.

The two wires that need investigation for location / connection are one thick red, CAN loom permanent live, to take some power feed strain off the ISO connection.

And one thick brown, CAN loom ground.
Grounding for most of the network components.
----------------------------------------

I must be puddled!! :scratch
User avatar
Robsey
Club Admin
Posts: 10612
Joined: Fri Dec 12, 2008 1:42 pm
Location: East Manchester

Putting Full CAN Infotainment in a Cavalier

Post by Robsey »

Just for a change, I looked at an alternative headunit.

Up to now, I have looked at the uber basic CD30 and Triple Info Display (TID),

Image

Eeeesh!!

and the CD70 Navigation headunit with Monochrome Graphic Info Display (GID)

Image

and later Colour Info Display (CID).

Image

And even a hybrid NCDC2013 (Only half CAN) as used in early top of the range Vectra-C and late Omega-B

Image

Image

After a pm on Vectra-C.com from Tony (himselfunknown) I took a look at a radio that I bought cheap four years ago.
(He now has a Vectra-C with the same model of radio that I am about to discuss).
He is also the chap that I got my C20NE engine from when he was still a regular on this forum.

This post is about the CDC40 Opera.
Known for having the best sound quality and capabilities of all the head-units of it's era. (2004 to 2009)
As fitted to many mid to higher specification Vectra-C, Astra-H and Zafira-Bs.

As it's name suggests, it has an integral CD multi-changer.
It also has an in-built graphic equalizer.

And as an optional extra, it is possible to add a DAB module.

I have no idea where the 'Opera' bit comes into the equation.

I had to add three data wires for this specific set-up to work properly.
Without them, the DAB generated an error message.

The end result from my playing tonight was a fully working headunit complete with DAB.
Sadly, not DAB+, but still more future friendly than all those FM radios currently out there.

Image

Image

For info, the 'F' on the display, is because I did not connect up my temperature sender.

And just because I can, I tried it with my colour display...
Note behind the security banner, it mentions CD changer. 8-)

Image

The big question is...
Now that I have added another option to the list, what the chuff do I do with all these toys?
lol :lol:

Plus - it is possible to add the bluetooth module as mentioned earlier with the CD70.

Just a couple of minutes with the OpCom interface to divorce and remarry-up the equipment as required.

The CDC40 Opera, DAB module and GID (graphic info display) are all still divorced.
So one less job to do.

UPDATE - Thread title changed from "Fitting Sat Nav" to "Putting Full CAN Infotainment".....to reflect other head-units used.
User avatar
Robsey
Club Admin
Posts: 10612
Joined: Fri Dec 12, 2008 1:42 pm
Location: East Manchester

Re: Putting Full CAN Infotainment in a Cavalier

Post by Robsey »

No photos today, but boredom drove me to visit this old chestnut.

I ensured that my CD70 Navi unit and colour display were divorced.
Took two attempts as I forgot which code they were paired with.
Turns out it was the security code that the Cavalier radio would have had from the factory.
I am so cheesey - lol.

Then checked the CDC40, and yup... it is in delivery state.
(Code not set).

Connected the CDC40, DAB box, UHP4 bluetooth unit and colour display.
Cleared fault codes - (all speakers open circuit), no fm reception. (Aerial not connected).
Set the radio to mute.

Re-paired up the components with the Cavalier code, and it is all working.

Just got to build up the courage to rip out the Cav dash again, and install all the gubbins from eight years ago.
:roll: :roll:
User avatar
Robsey
Club Admin
Posts: 10612
Joined: Fri Dec 12, 2008 1:42 pm
Location: East Manchester

Re: Putting Full CAN Infotainment in a Cavalier

Post by Robsey »

I am hoping that this will be reality this year (2022).

After failing to sell the CDC40 radio, display, dab and bluetooth units...
I took it as s sign that maybe I should give this one more punt.

The only issue I have is that I stripped out my DAB connector and loom to produce an adapter loom for someone else, who had bought my 'spare' dab module on ebay.

Image

Thankfully I was able to find a connector with 30cm loom for a nominal amount.
From a bmw window switch loom of all places.

Image

So - plan is to rebuild my loom this weekend.
Only about eight wires...

Image

Image

I have partially re-populated the connector, but would prefer heavier wires for power and ground feeds.
The other six wires are only 0.35mm csa audio signal and data wires.

Then just a matter splicing into the main loom.
:shock: :ugeek:

As an added bonus, I was thinking of fitting an Aux-In switch-over adaptation, so that I could route any external audio device via the dab unit audio wires.

As usual, it will be the physical fitting and final finish of the radio and display that will be the true complicated part.
The electronics and data comms is a piece of cake.
User avatar
vexorg
Registered user
Posts: 417
Joined: Sun Feb 14, 2021 1:22 pm

Re: Putting Full CAN Infotainment in a Cavalier

Post by vexorg »

What did you do with the heater controls???
David
User avatar
Robsey
Club Admin
Posts: 10612
Joined: Fri Dec 12, 2008 1:42 pm
Location: East Manchester

Re: Putting Full CAN Infotainment in a Cavalier

Post by Robsey »

Moved them to where the ashtray was.

Here is my earlier set-up.
Many moons ago :)

Image

And the later display housing and colour display.

Image

So just the radio housing to sort -
I am planning on grafting a Vivaro radio surround into the Cavalier dash.
It is a tight fit, complicated further with the taper of the dash.
User avatar
vexorg
Registered user
Posts: 417
Joined: Sun Feb 14, 2021 1:22 pm

Re: Putting Full CAN Infotainment in a Cavalier

Post by vexorg »

That oddly works
David
User avatar
Robsey
Club Admin
Posts: 10612
Joined: Fri Dec 12, 2008 1:42 pm
Location: East Manchester

Re: Putting Full CAN Infotainment in a Cavalier

Post by Robsey »

vexorg wrote: Thu Jan 06, 2022 1:40 pm That oddly works
Just realised on the way home that it is a similar format to our vectra-c

Display on top.
Radio in the middle.
Heater panel bottom.

Image
User avatar
Robsey
Club Admin
Posts: 10612
Joined: Fri Dec 12, 2008 1:42 pm
Location: East Manchester

Re: Putting Full CAN Infotainment in a Cavalier

Post by Robsey »

After fives hours, I have finally completed the repair of the CAN loom.
Only eleven wires - tee hee.

Three for serial data, (display to head-unit).
Image

Two for power and ground, (dab to main loom)
Two for mid-speed CAN data network.(dab to display)

Image

Four for the audio (left and right signal and reference - dab to head-unit).

One thing I did notice, was that my previous wiring attempt had been slightly wrong.
Two of the dab audio wires had been placed one position too low on the forty-pin head-unit connector.
Pin 32 was in location 31.
Pin 31 was in location 30.
At least the reference line on pin38 was correct.

Image

It means that one channel would not be connected.
The other channel would have come out of the wrong side.
Even after all these years of faffing, I still get it wrong now and again.

This time it is all spot-on.
User avatar
Robsey
Club Admin
Posts: 10612
Joined: Fri Dec 12, 2008 1:42 pm
Location: East Manchester

Re: Putting Full CAN Infotainment in a Cavalier

Post by Robsey »

Fired it all up today, and gee-whizz, it all seems to work fine. :)

Radio off but ignition on.

Image

Bluetooth working.

Image

Image

Audio settings - Equaliser

Image

Sound settings

Image

DAB main screen

Image

DAB is was a bit intermittent... but then the aerial was strapped to my cooker hood, so indoors.

It was able to scan for DAB channels, but some DAB+ channels cause a DAB error.

Hmm looking to earlier posts, I think I like the night colours better :) (the blue background images)
User avatar
Robsey
Club Admin
Posts: 10612
Joined: Fri Dec 12, 2008 1:42 pm
Location: East Manchester

Re: Putting Full CAN Infotainment in a Cavalier

Post by Robsey »

A bit more playing this weekend.

First a bit of pre-amble...
I had put a 2003 Vectra-C / Signum navigation radio and colour display up for sale at Christmas, but I had no bites.
I had guessed that it may have sold better if it had not been locked in night-time colours.

So I had decided to have another look at reprogramming / setting up the radio and display.

So this weekend I pulled my finger out and did some faffing.
This had two elements:-

1 - Make up a half-CANbus loom for an earlier Vectra-C / Signum Sat Nav Radio.

This was a "Budget-bobs" job, meaning that only salvage parts collected over the past 15 years were used.
Therefore - it cost me nothing except time and a bit of electricity for the soldering iron.

The loom linked a power supply, radio, display and diagnostic port.

2 - The programming part.

Using my old clunker XP laptop running an old Op-Com interface.
I tried version 100820 advanced, 110305 CAN modified, but neither gave me any useable functions.
I then tried my newest version - a 2015 release.
Bingo.!!
There are extra options -
Opel Colour Schema (dark / night colours).
Vauxhall Colour Schema (grey / day colours).

So the latter option it is.

Before: -

Image

Image

Image

After: -

Image

Image

Image

Image

Job done :)
Post Reply